Creating the Entity Description
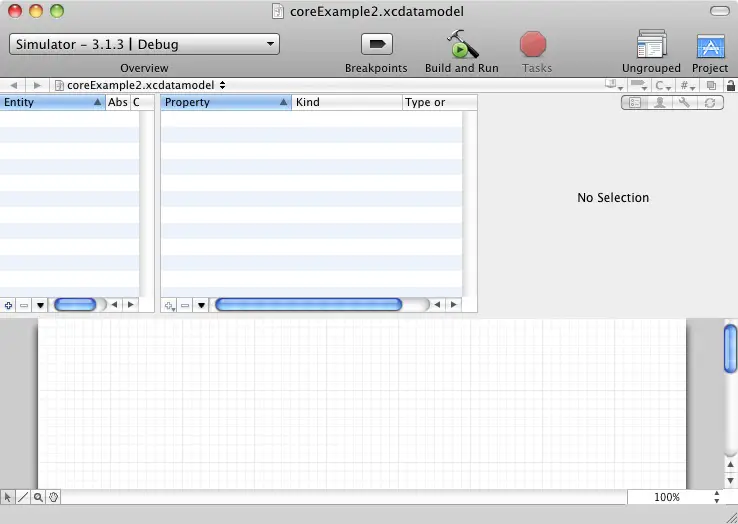
The entity description defines the model for our data, much in the way a schema defines the model of a database table. To create the entity for the Core Data application, double click on the coreData.xcdatamodel file to load the entity editor:
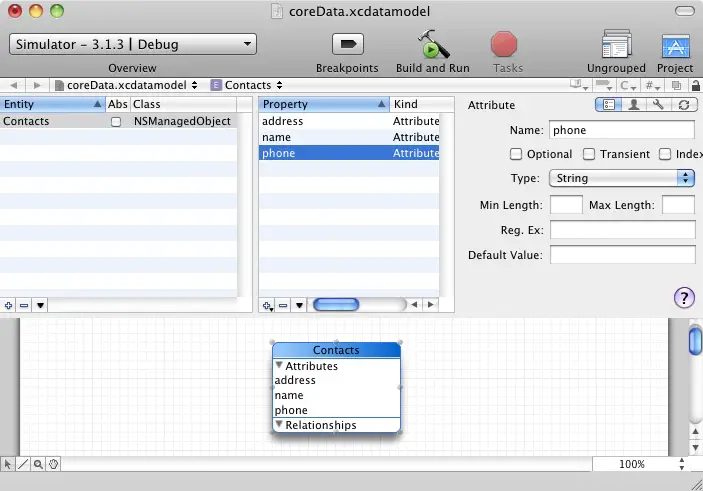
To create a new entity, click on the + button located in the bottom left hand corner of the Entity panel. In the detail panel, name the entity Contacts. With the entity created, the next step is to add some attributes that represent the data that is to be stored. To do so, click on the + button of the Property panel and select Add Attribute from the menu. In the detail pane, name the attribute name, deselect the Optional check box and set the Type to String. Repeat these steps to add two other String attributes named address and phone:
Save the entity description (File -> Save) and close the editing window. The entity is now defined and it is time to start writing code.
Adding a View Controller
In order to add Core Data support to our application we had to choose the Window-based Application project template option when we started Xcode. As such, we now need to create our own view controller.
Within the main Xcode project window, ctrl-click on the Classes folder located in the Groups and Files panel. From the popup menu, select Add -> New File... In the new file window, select the UIViewController subclass icon and make sure that the UITableViewController subclass check box is not selected, but that the With XIB for user interface option is selected. Click Next, name the file coreDataViewController.m and make sure that the Also create coreDataViewController.h file option is selected before clicking on the Finish button.
Now that we have added the view controller class to the application we need to modify our app delegate to make this the root view controller. In the main Xcode project window, select the coreDataAppDelegate.h file and modify it to add references to our view controller:
@class coreDataViewController;

@interface coreDataAppDelegate : NSObject <UIApplicationDelegate> {

    NSManagedObjectModel *managedObjectModel;
    NSManagedObjectContext *managedObjectContext;
    NSPersistentStoreCoordinator *persistentStoreCoordinator;

    coreDataViewController *viewController;

    UIWindow *window;
}

@property (nonatomic, retain, readonly) NSManagedObjectModel *managedObjectModel;
@property (nonatomic, retain, readonly) NSManagedObjectContext *managedObjectContext;
@property (nonatomic, retain, readonly) NSPersistentStoreCoordinator *persistentStoreCoordinator;
@property (nonatomic, retain) IBOutlet UIWindow *window;
@property (nonatomic, retain) IBOutlet coreDataViewController *viewController;
- (NSString *)applicationDocumentsDirectory;
@end
With an instance of the view controller declared in the interface file we now need to modify the applicationDidFinishLaunching method located in the coreDataAppDelegate.m implementation file to add the view controller to our window. Note also that we have to import coreDataViewController.h into this file and synthesize accessors for the viewController object:
#import "coreDataAppDelegate.h"
#import "coreDataViewController.h"

@implementation coreDataAppDelegate

@synthesize window;
@synthesize viewController;

#pragma mark -
#pragma mark Application lifecycle

- (void)applicationDidFinishLaunching:(UIApplication *)application {

        // Override point for customization after app launch
        [window addSubview:viewController.view];
        [window makeKeyAndVisible];
}
.
.
@end
Once the changes have been made, be sure to save both files before proceeding. Failure to save the changes at this point will likely cause problems in later steps.
Connecting the View
The next step is to add the new view controller to the project, associate it with the view NIB file and connect it to the application delegate.
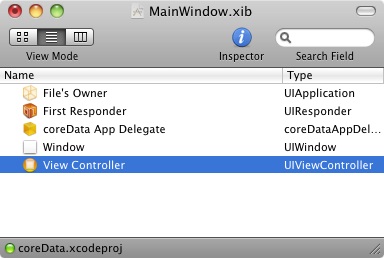
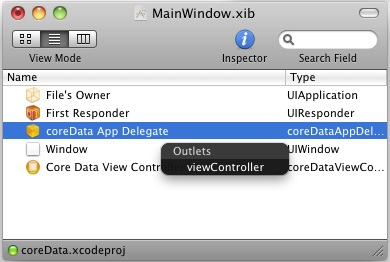
Select the coreData entry from the top of the Groups & Files list to display all the files in the project and scroll down to MainWindow.xib. Double click on this file to load it into the Interface Builder tool. From the Library window, drag and drop a View Controller object onto the MainWindow.xib window. Once released, the new view controller should appear beneath the existing objects as illustrated in the following figure:
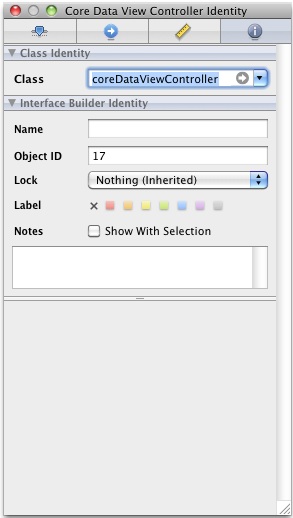
With the new view controller selected, open the Identity Inspector window (Tools -> Identity Inspector or Command + 4) and change the Class value to coreDataViewController:
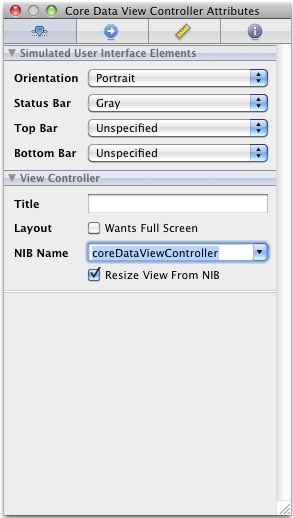
Display the Attributes page by selecting the far left toolbar button in the inspector window and assign coreDataViewController as the NIB file:
Finally, establish a connection between the application delegate and the view controller. This is achieved by ctrl-clicking on the core Data App Delegate item in the MainWindow.xibwindow, dragging the resulting blue line to Core Data View Controller item in the same window and selecting viewController from the menu:
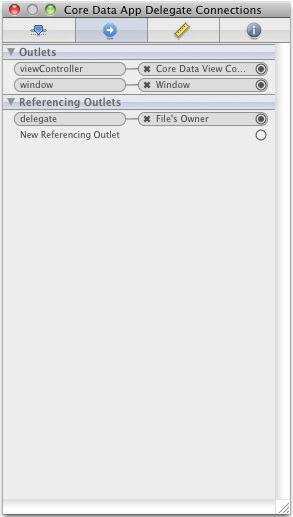
With the Core Data App Delegate item selected in the MainWindow.xib file and the Connections Inspector displayed, the settings should appear as shown in the following figure:
Save the file and exit from Interface Builder.
Now that we have a view controller programmed into our application we need to extend that class to include some actions and outlets.
Adding Actions and Outlets to the View Controller
As with previous instances of our Contacts application, our Core Data example will include a user interface that needs to accept and display name, address and phone information and to react to the selection of a save and a find button. In addition, a status label will be used to provide the user with feedback. To declare the outlets and actions associated with theseuser interface components, select the coreDataViewController.h file and modify the class declaration so that it reads as follows:
#import <UIKit/UIKit.h>

@interface coreDataViewController : UIViewController {
        UITextField *name;
        UITextField *address;
        UITextField *phone;
        UILabel         *status;
}
@property (nonatomic, retain) IBOutlet UITextField *name;
@property (nonatomic, retain) IBOutlet UITextField *address;
@property (nonatomic, retain) IBOutlet UITextField *phone;
@property (nonatomic, retain) IBOutlet UILabel *status;

- (IBAction) saveData;
- (IBAction) findContact;
@end
Save the file, then select the coreDataViewController.m implementation file, add an @synthesize directive for the outlets and add template methods for the two declared actions:
#import "coreDataViewController.h"
#import "coreDataAppDelegate.h"

@implementation coreDataViewController
@synthesize name, address, phone, status;

- (void) saveData
{
}

- (void) findContact
{
}
.
.
@end
Once the changes are complete save the file before proceeding.
Designing the User Interface
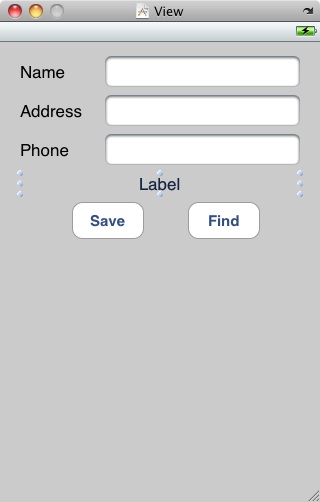
With the actions and outlets defined, now is a good time to design the user interface and establish the connections. To load the Interface Builder tool, double click on thecorewDataViewController.xib file. The user interface and corresponding connections used in this tutorial are the same as those in previous data persistence chapters. The completed view should appear as follows:
Before saving the user interface design, stretch the status label (located above the two buttons) so that it covers most of the width of the view as show above. Finally, edit the label and remove the word “Label” so that it is blank.
Next, connect the three text fields and status label to the name, address, phone and status outlets respectively by holding down the Ctrl key and clicking and dragging from File’s Owner entry in the documents window to a text field component. From the resulting menu select the outlet corresponding to the selected view object.
The last step involves connecting the two buttons to the corresponding actions. First, display the Connections Inspector (Tools -> Connections Inspector) then select the Save button. Click inside the small circle next to the Touch Up Inside event in the Connections Inspector window and drag the blue line to the File’s Owner. To establish the connection, select saveData from the resulting menu. Repeat these steps to connect the Find button to the findContact action before saving the design and exiting Interface Builder.
Saving Data to the Persistent Store using Core Data
When the user touches the Save button the saveData method is called. It is within this method, therefore, that we must implement the code to obtain the managed object context and create and store managed objects containing the data entered by the user. Select the coreDataViewController.m file, scroll down to the template saveData method and implement the code as follows:
- (void) saveData
{
        coreDataAppDelegate *appDelegate = [[UIApplication sharedApplication] delegate];

        NSManagedObjectContext *context = [appDelegate managedObjectContext];

        NSManagedObject *newContact;

        newContact = [NSEntityDescription insertNewObjectForEntityForName:@"Contacts" inManagedObjectContext:context];

        [newContact setValue:name.text forKey:@"name"];
        [newContact setValue:address.text forKey:@"address"];
        [newContact setValue:phone.text forKey:@"phone"];

        name.text = @"";
        address.text = @"";
        phone.text = @"";

        NSError *error;
        [context save:&error];
 status.text = @”Contact saved”;
}
The above code identifies the application delegate instance and uses that object to identify the managed object context. This context is then used to create a new managed object using the Contacts entity description. The setValue method of the managed object is then called to set the name, address and phone attribute values of the managed object (which in turn are read from the text field user interface compoments). Finally the context is instructed to save the changes to the persistent store with a call to the context’s save method.
Retrieving Data from the Persistent Store using Core Data
In order to allow the user to search for a contact it is now necessary to implement the findContact action method. As with the save method, this method will need to identify the application delegate and managed object context. It will then need to obtain the entity description for the Contacts entity and then create a predicate to ensure that only objects with the name specified by the user are retrieved from the store. Matching objects are placed in an array from which the attributes for the first match are retrieved using the valueForKey method and displayed to the user. A full count of the matches is displayed in the status field.
The code to perform these tasks is as follows:
- (void) findContact
{
        coreDataAppDelegate *appDelegate = [[UIApplication sharedApplication] delegate];

        NSManagedObjectContext *context = [appDelegate managedObjectContext];

        NSEntityDescription *entityDesc = [NSEntityDescription entityForName:@"Contacts" inManagedObjectContext:context];

        NSFetchRequest *request = [[NSFetchRequest alloc] init];

        [request setEntity:entityDesc];

        NSPredicate *pred = [NSPredicate predicateWithFormat:@"(name = %@)", name.text];

        [request setPredicate:pred];

        NSManagedObject *matches = nil;
        NSError *error;

        NSArray *objects = [context executeFetchRequest:request error:&error];

        if ([objects count] == 0) {
                 status.text = @"No matches";
        } else {
                matches = [objects objectAtIndex:0];
                address.text = [matches valueForKey:@"address"];
                phone.text = [matches valueForKey:@"phone"];
                status.text = [NSString stringWithFormat:@"%d matches found", [objects count]];
        }
        [request release];
}
Releasing Memory
Prior to compiling and running the example Core Data iPhone application, it is important that we add code to free up any resources that were allocated during execution of the application. To do so, edit the coreDataViewController.m file and modify the viewDidUnload and dealloc methods as follows:
- (void)viewDidUnload {
        // Release any retained subviews of the main view.
        // e.g. self.myOutlet = nil;
        self.name = nil;
        self.address = nil;
        self.phone = nil;
        self.status = nil;
}
- (void)dealloc {
        [name release];
        [address release];
        [phone release];
 [status release];
        [super dealloc];
}
Building and Running the Example Application
The final step is to build and run the application. Click on the Build and Run button located in the toolbar of the main Xcode project window. Save all files if prompted to do so and wait for the compilation to complete. If errors are reported check the syntax of the code you have written, using the error message provided by Xcode as guidance. Once the application compiles it will launch and load into the iPhone simulator. Enter some test contacts (some with the same name). Having entered some test data, enter the name of the contact for which you created duplicate records and click the Find button. The address and phone number of the first matching record should appear together with an indication in the status field of the total number of matching objects that were retrieved.
Link-- http://www.techotopia.com/index.php/An_iPhone_OS_Core_Data_Tutorial


No comments:
Post a Comment